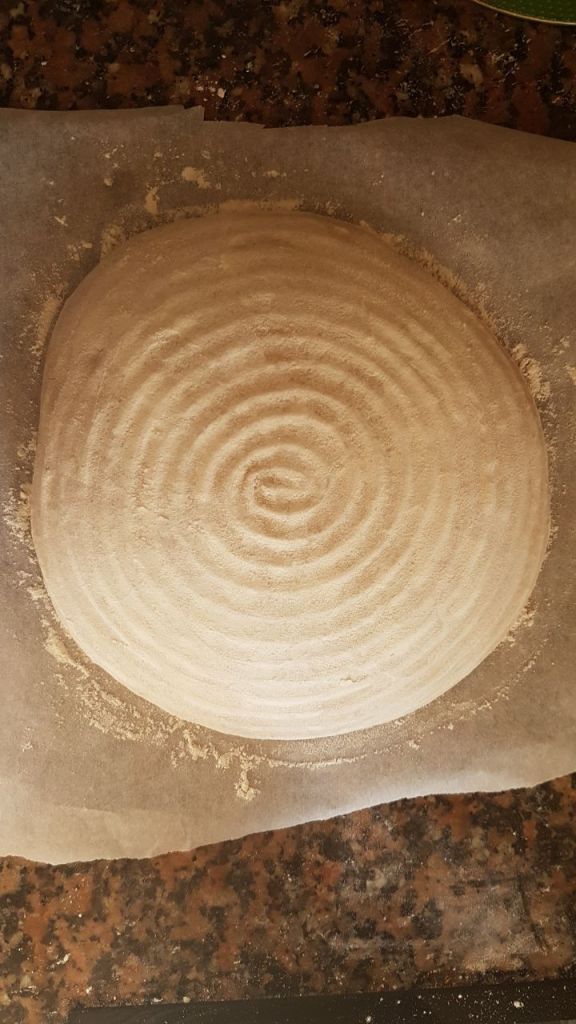
Today I bring you a new bread recipe. Miche bread dis one the most famous rustics breads in France. The recipe I share today is a version of the one Sarah Owens shows in her book “Toast & Jam” (2017). My boule is a gazillion light-years away from looking like hers but a girl has to start somewhere!
Ingredients
• 110 g. of active rye sourdough leaven.
• 430 g. lukewarm water.
• 400 g. baker flour.
• 110 g. 000 type flour.
• 40 g. rye flour.
• 10 g. salt.
Steps to follow
• Mix the water with the flours until there are no traces of dry flour left.
• Let stand (autolysis) for 2 hours in a container covered with a cloth or a shower cap.
• After 2 hours, add the sourdough. Let stand 30 minutes and add the salt.
• From here, the block fermentation will take place for the next 4 hours, doing the stretch and fold technique every 40 minutes.
• After block fermentation, let the dough rest on a floured surface for 30 minutes.
• Next, form the boule and place it in a well-floured banneton.
• Cover the banneton with a cloth and a shower cap, then leave it to prove slowly in the fridge for 14/16 hours or over night.
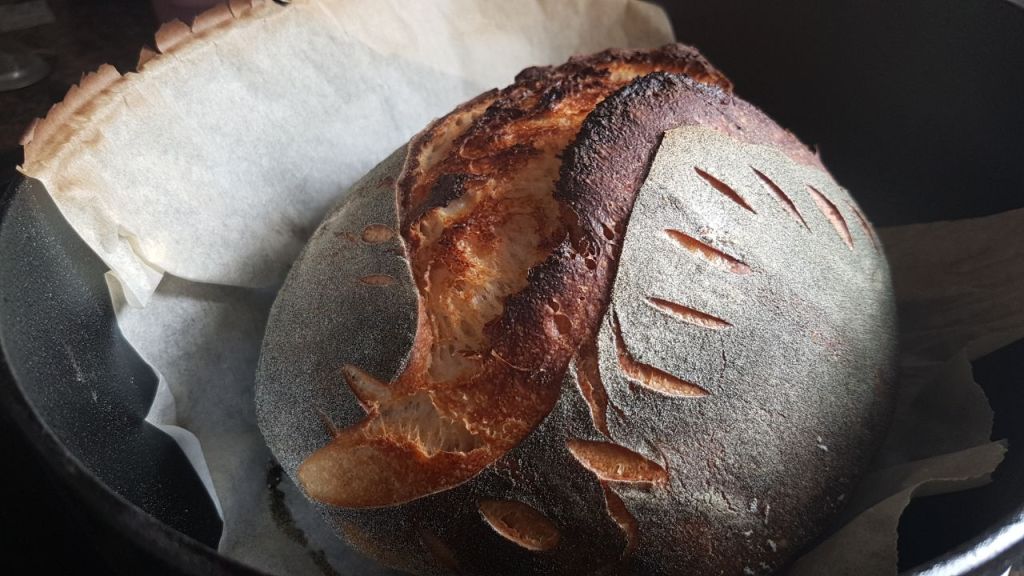
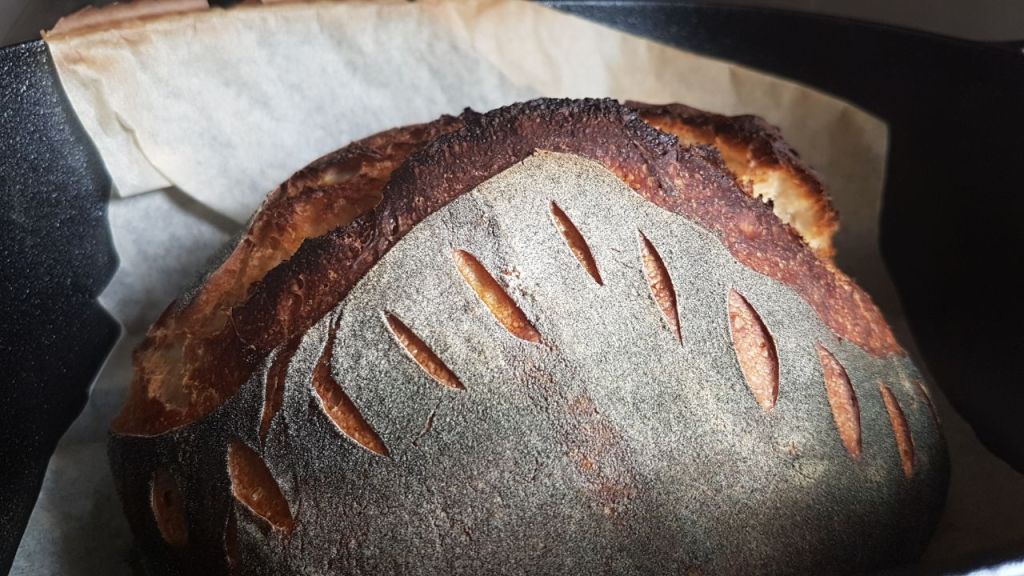
• Remove the banneton from the fridge when preheating the oven. Score the way you like.
• Preheat the oven to 250 degrees with a Dutch oven inside for 20 minutes.
• Place the boule in the Dutch oven with a piece of baking paper on the base so that it does not stick.
• Bake for 20 minutes with the lid on and 10 with the lid off.
Today I bring you a different approach to sourdough bread by adding Chlorella powder in the final dusting.
Chlorella is a single-celled freshwater algae full health befenits. Some people even call it a super food. Withing the many nutrients it has, you can find: Omega 3, fiber, antioxidants, Vitamin C and B12 (among others) and loads of proteins.
Ingredients:
80% Bread flour.
20% Spelt flour.
75% Hydration.
20% Sourdough.
2% Salt.
Optional: Dust with chlorella right before scoring.
Steps to follow:
Follow the block fermentation steps described in the previous recipe Sourdough Bread with Galician Flour
Pizza, mother of street food, is a dish as versatile (and controversial) as the Spanish omelette. It can hold all ingredient you can imagine (yes, pineapple too!) And is so good that no one can refuse a slice.
Although it is known that, as early as 8000 B.C. (with the origins of bread), flatbreads with cheese were part of the Middle Eastern diet, the first elaboration called pizza (made with white sauce) appears in Naples back in the sixteenth century. It is not until the seventeenth century that pizza started to look more like the dish we know today.
As a curious fact, a century later, in 1889, the famous Pizza Margherita was created (in honour of the Queen of Italy, Margherita di Savoia). Thanks to the colours of its ingredients (tomato, basil and mozzarella) this elaboration became a national emblem as it represented the colours of the Italian flag.
As for the dough, it is one of the simplest and most basic culinary procedures (water, yeast and flour) but, depending on the area it comes from, the thickness and shape of the dough may vary. Some of the best-known examples are:
• Neapolitan: the first original pizza recorded (if we do not take into account the proto-pizzas mentioned before). The main feature of the Neapolitan dough is its cornicione, a rounded, well-hollowed edge. In addition, the Associazione Verace Pizza Napoletana, states a series of rules to follow in order to make the authentic Neapolitan pizza, as it is recognized as STG. Among the many indications that this association requires we can highlight that the pizza must be completely artisanal (and cooked in a wood oven), it must proof a minimum of 8 hours, high quality ingredients must be used and the stipulated measures must be respected, not exceeding 35 centimetres of diameter and having a cornicione between 1 or 2 centimetres.
• Roman: Crispy dough with hardly any cornicione. The key to this pizza is its extreme fineness.
• Deepdish / Chicago: A dough of Italian American origin characterized by its thickness and its cheese-filled edges.
Ingredients
• 500 g. of 000 or bread flour.
• 48 g. of active sourdough.
• 300 g. lukewarm water.
• 10 g. salt.
• 15 ml. of EVO.
Steps to follow:
• In a large bowl, mix the flour with the rest of the ingredients until there are no dry elements left.
• Let it proof for 2 hours (no, you don’t need to knead!).
• After 2 hours (or when you see that the dough doubles in size), divide the dough into four portions and shape the buns.
• Leave them in the fridge in a container or tray covered with a rag or kitchen film for a minimum of 24 hours.
• Once the buns are out of the fridge, flour the work table and shape the pizza dough.
• To prepare a Roman pizza (if we are not expert pizza makers), the simplest method is to stretch it by using a rolling pin. Thus, you will obtain an ultra-fine dough.
• On the contrary, if you prefer Neapolitan pizza, the trick is to stretch your hands, cross your index fingers and stretch the dough outwards (always respecting the edges so as not to spoil the cornicione). Every 3 pushes you will rotate the dough. Once you have the dough half-stretched (about 15 cm) start stretching by using the outside of the little finger, making circular movements towards the ends.
• Once the dough is stretched, top the pizza with whatever ingredients you like and cover the base of a tray (or stone) with semolina.
• Bake at 250 degrees Celsius until you get a golden pizza with well-melted gooey cheese.
NOTES: Note 1: Once the proofing time in the fridge has passed, if you do not want to use all the buns, you can freeze them. They hold up perfectly in the freezer and once thawed they will continue to be elastic and gasified. Note 2: This amount of dough is for 4 medium-sized Roman or 2 Neapolitan pizzas (approximately 35 centimetres).
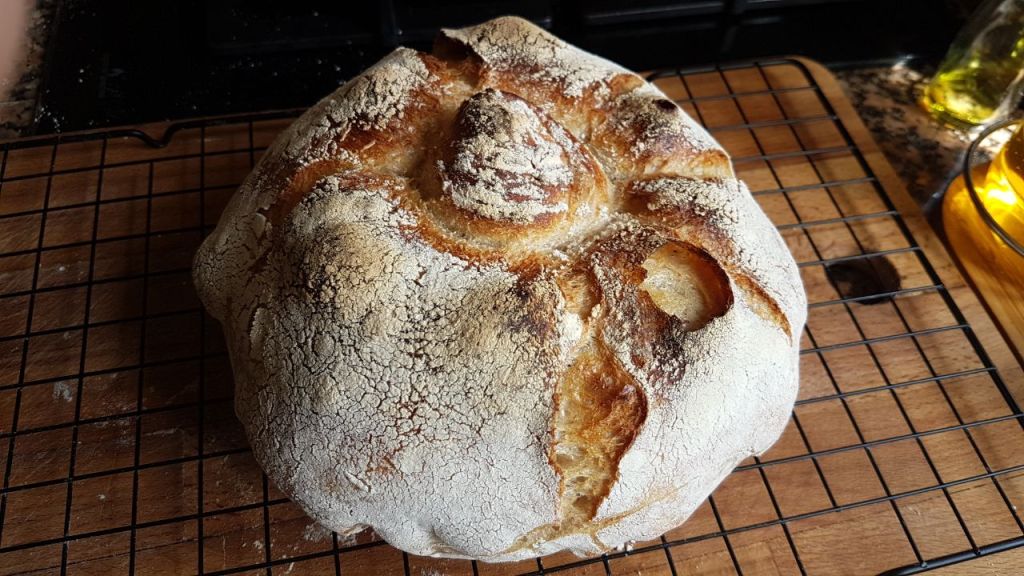
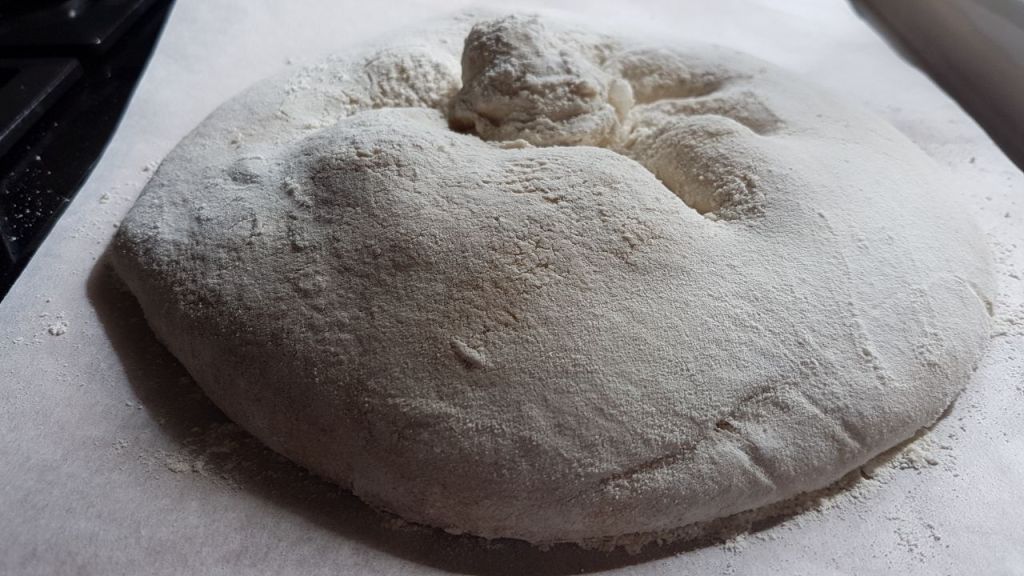
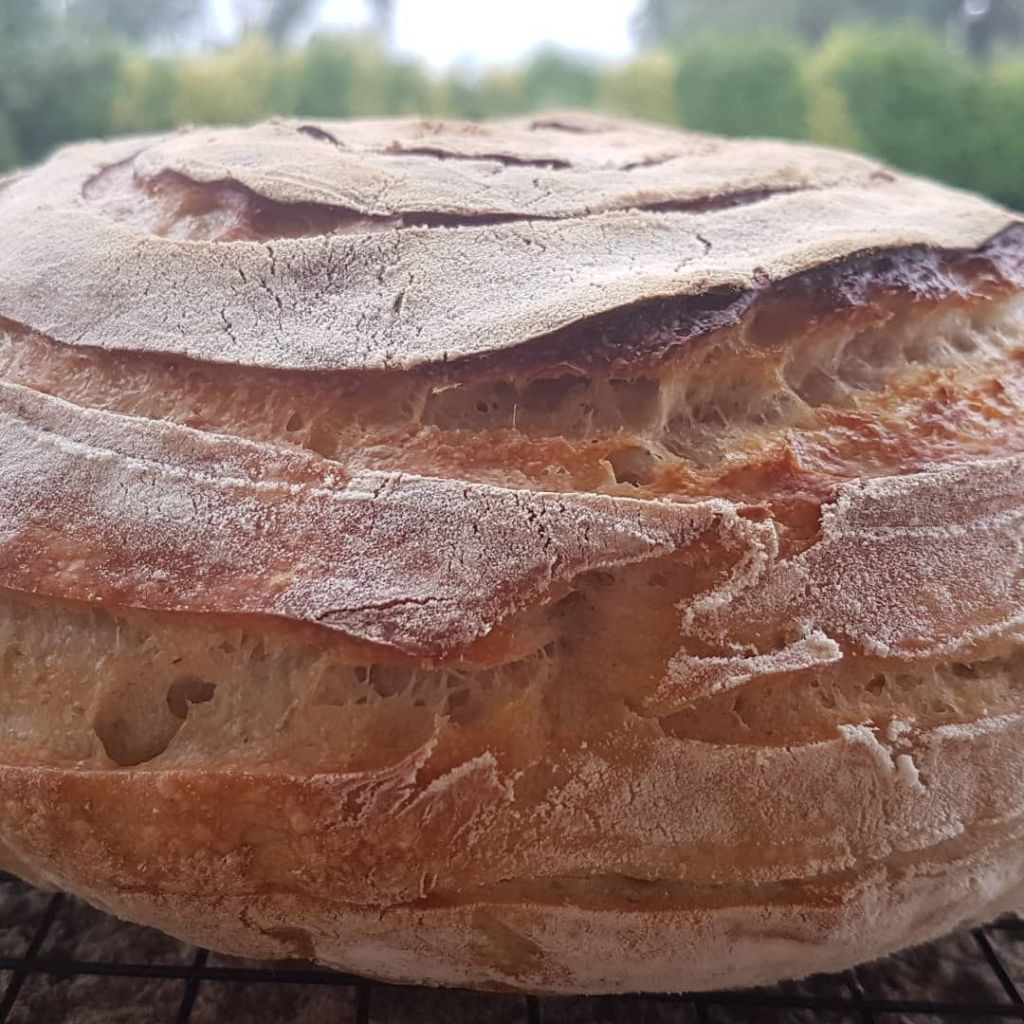
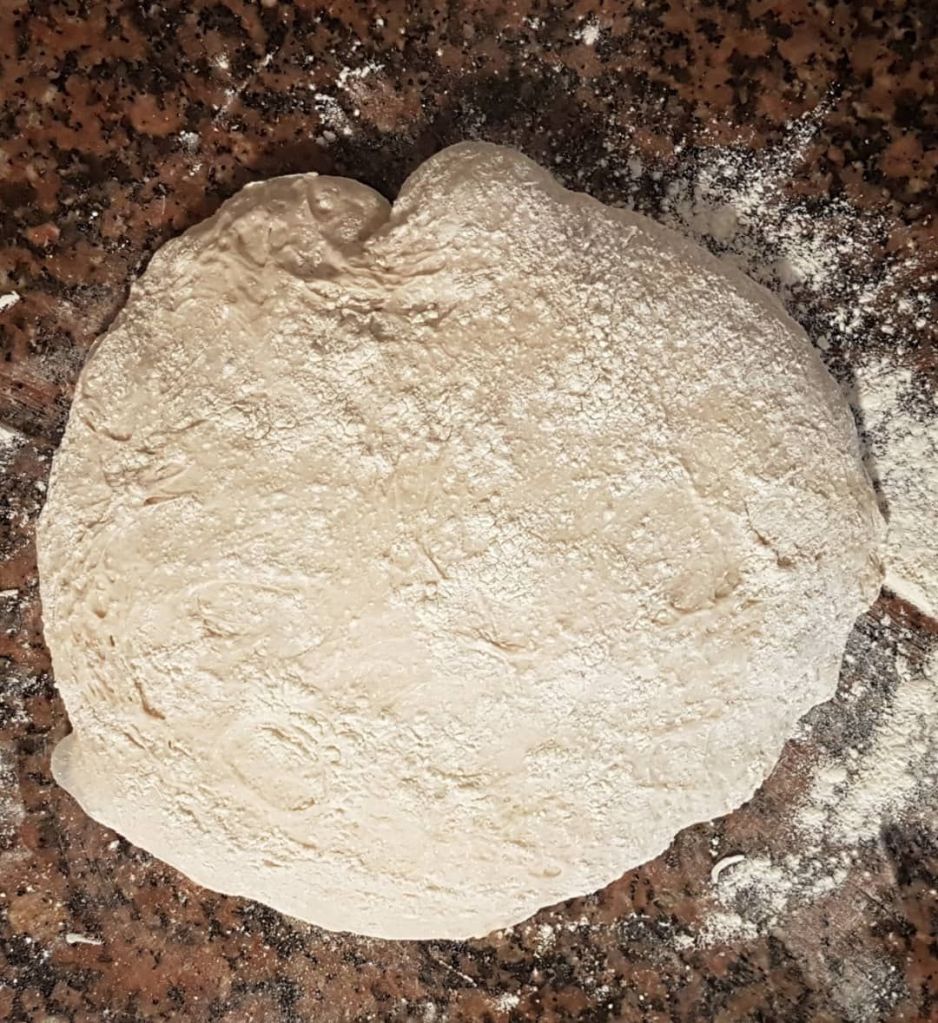
The top bun of the molete is the distinctive sign of this Galician bread (and also the most difficult part to create). After much trying, I came to the conclusion that there are two techniques that help us get a good bun without damaging our bread and without having to do pizzaiolo moves.
Technique 1: Pinch the centre of the dough firmly from the bottom. Then turn the dough several times until the bun is tight. Technique 2: Pinch the centre of the dough firmly from the bottom. Pull up on the pinched piece of dough (careful not to break it) and make a knot.
Ingredients:
• 390 ml. lukewarm water.
• 375 g. strength flour.
• 45 g. rye flour.
• 10 g. of salt.
• 80 g. sourdough.
Steps to follow:
• Put the flours in a large bowl that allows you to work the dough.
• Incorporate the water and mix well until there is no dry flour left.
• Autolysis period for 30 minutes.
• Add the sourdough. Let prove for 20 minutes.
• Add salt and incorporate well into the dough.
• Let prove for 30 minutes.
• Bulk fermentation for 4 hours. Stretch and fold every 30 minutes.
• As soon as bulk fermentation ends, flour the work table and place the dough on top.
• Let stand 30 minutes.
• Preform the loaf and leave it in a floured banetton.
• Refrigerate from 12 to 16 hours or overnight.
• Heat the oven to 250 degrees Celsius with a Dutch oven inside.
• Shape the bun following the knot or twist technique.
• Bake for 30 minutes with the lid on and another 10 minutes with the lid off.
Bread has thousands of shapes and flavours, so every time we knead a new dough we can play with flours, hydration and shape. Today’s recipe is yet again another sourdough loaf (kneading ritual that I follow religiously every Sunday) but with a different mixture of flours and hydration, both in type and quantity. In this case, the thick crumb of this loaf is perfect for those meals in which it is nice to deep in a good piece of bread; in winter on stews and in summer with a good grilled sardine.
Ingredients
600 gr lukewarm water
100 gr Galician flour
750 gr 000 flour
160 gr sourdough starter
16 gr salt.
Technique
Mix the flours with the lukewarm water (until there is no trace of dry flour) in a large container that allows you to work the dough comfortably.
Let stand 20 minutes so the dough starts the process of self-management, called autolysis.
Add the sourdough to the whole, with a quick kneading, either with your fingers or with a spatula.
10 minutes later, add salt.
Block fermentation for 4 / 6h.
Use the stretch and fold technique every 40 minutes (approx.) during the block fermentation.
Flour the work table and shape the bread
Put the bread in a banneton and refrigerate for 14/16 h.
Preheat the oven to 250º with a Dutch oven inside.
Bake the bread for 20 minutes in the Dutch oven with the lid on.
Bake for another 15 minutes without the lid.
Let cool on a rack for about 2 hours before cutting.
If we want to talk about culinary tradition, there are few things as old as sourdough. The oldest ferment we know about dates back to 3700 B.C., according to M.G. Ganzie’s studies. However, this chemical eddy of lactobacilli and yeast is a biological process that has been going on for over 10,000 years, as the origins of bread seem to be located in the historical region of the Fertile Crescent, with the beginnings of agriculture. Once again, bread stands out as that primordial food that remains key in our diet today.
Creating sourdough starter is a very simple process that, like all yeasts, only requires time and patience. Actually, if you want it to stay active 24/7, it’s basically like taking care of a Tamagochi; you have to feed it and make sure it doesn’t die. Nothing else!
Once you have managed to have a very active and consistent starter it is all a matter of maintenance. If you take care of the sourdough, it will last almost forever. You only need to take a look at the ferments on display at the sourdough library in St.Vith (Belgium). This institution is dedicated to preserving historical pieces of starter. A good example of this longevity would be the Sapore Madre, an Italian sourdough starter that has been active, and being fed daily, since 1923!
However, if perseverance is not your thing, or if you will only use the starter occasionally, all you have to do is store it in the fridge. That way, the yeasts will fall asleep, so to speak, and you won’t have to look out for it daily.
In my case, if I want to knead in the morning (bread, pizza, donuts, focaccia …), I take the sourdough out of the fridge the previous afternoon, let it cool down, and refresh it. Then, I put the starter in a glass jar (I have already told you that I always recommend fermenting in glass) and let it rise overnight. So, in the morning I will have my levain super active and ready to knead.
What is the trick to obtain a good yeast? Keep on trying (and failing) on the quantities, flour mixes, etc. After much testing (and failing), I managed to come up with the right amounts to get a strong and durable sourdough,taking Sarah Owens and Joshua Weissman techniques as model. To succeed with this recipe you have to be consistent (at least 7 days) and follow the steps I set out below. After all, it will be a matter of: introducing its preservation into your routine or just keep it in the fridge so that the sourdough takes a good nap.
Day 1: 100 gr rye flour or wholemeal flour 150 ml lukewarm water
Mix well in a glass jar and store in a dark, dry place. Cover it with muslin or with a loosen lid, otherwise it could turn into a fermenting bomb!
Day 2:
Leave 70gr of levain 50gr rye flour or wholemeal flour 50gr wheat flour 120ml lukewarm water
Day 3:
Leave 70gr of levain 50gr rye flour or wholemeal flour 50gr wheat flour 110ml lukewarm water
Day 4:
Leave 70gr of levain 50gr rye flour or wholemeal flour 50gr wheat flour 100ml lukewarm water
Day 5:
Leave 70gr of levain 50gr rye flour or wholemeal flour 50gr wheat flour 100ml lukewarm water
Day 6:
Leave 50gr of levain 50gr rye flour or wholemeal flour 50gr wheat flour 100ml lukewarm water
Day 7:
Leave 20gr of levain 50gr rye flour or wholemeal flour 50gr wheat flour 100ml lukewarm water
Henceforth, you should already have a good active sourdough. If not, don’t despair, keep doing it for a few more days. Just think that room temperature plays a very important role. If you live in a warm place (over 25 degrees Celsius), the process will be much faster.
NOTE: Do NOT throw away the levain you are removing from the refreshing step! You can make other tasty recipes such as pancakes or cookies with it.