You know that everything that has to do with bread has already won me over from the very beginning. I don’t care if it’s wholemeal, spicy, square, tall, flat, or if it has horns, if it’s bakeable, it has to be a treat!
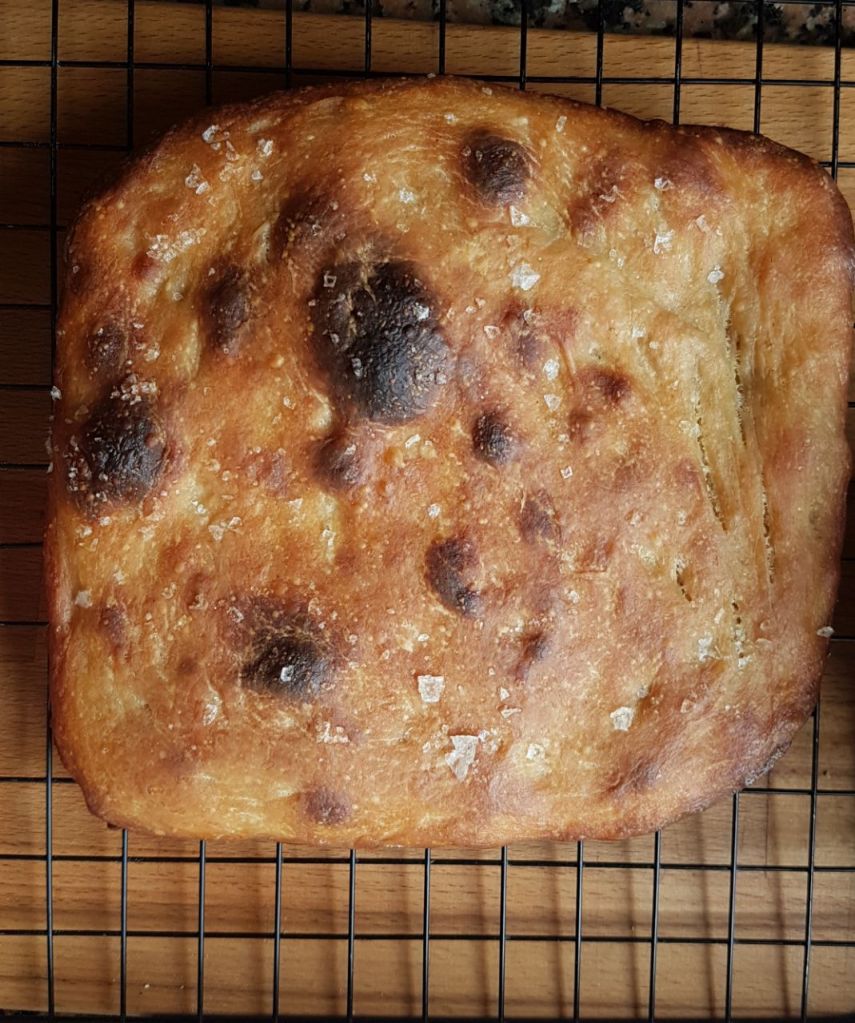
One of those bread derivatives that has me completely in love, is Italian focaccia. This flatbread is great as a snack or as a side to dinners, for example. As for the ingredients to top it with, the list is endless. Like pizza, focaccia accepts almost anything that comes to mind. In this case, I share with you the most basic recipe, focaccia Genovese, with just salt.
Ingredients:
• 350 g. strong flour.
• 200 m. lukewarm water.
• 7 g. dry yeast.
• salt.
• EVO.
Steps to follow:
• Mix the flour with the dry yeast and 30 ml. of EVO. Dissolve 8 g. of salt in the water and add it to the flour.
Knead until you get an elastic and soft dough. If you use a food processor, it will be ready in 5 minutes. If you do it by hand, it will be necessary to knead for at least 15 minutes.
• Let prove 45 minutes by covering the dough with a cloth or in a bowl covered with a shower cap.
• Once the dough is fermented, it is necessary to stretch it on an oven tray, making sure that the dough does not lose all the air.
• Let prove for another additional 45 minutes.
• After that, you will have to wet the focaccia with a splash of EVO and integrate it with your fingers all over the dough, making small holes.
• Sprinkle flaked salt over the entire surface of the focaccia.
• Bake at 220 degrees Celsius for 20 minutes.
• Let cool on a rack for about 30 minutes before serving.
One of the main reasons I love pizza is because it can become the perfect base of a zero-waste dish. This time it will show you how to make a stewed oxtail recipe.
Two days ago, I cooked oxtail (in the Dutch oven) with mashed potatoes. This dish is so filling that I always end up with leftovers. For this reason, I decided to shred the remaining pieces too (making a kind of pulled-pork) and set aside to make this pizza.
As for the dough, I made a pizzaal taglio (rectangular in shape) but with cornicione (typical of Neapolitan pizza). This type of pizza is very famous in regions like Rome or Sicily, it is usually sold by weight and with thousands of combinations on top. Of course, in Italy they do not usually abuse the amount of ingredients, in pizzas, less is always more.
Ingredients for stewing the oxtail
• 1000 g. oxtail.
• 1 carrot in dices.
• 1 leek.
• 1 squash in dices.
• 1 tomato in dices.
• 1 crust of parmesan.
• 2 tablespoons flour.
• 1 stick of cinnamon.
• 20 ml. of Perrins sauce.
• 100 ml. of Mencía wine.
• 1 sprig of thyme
• 1 sprig of rosemary
• Season with salt and pepper to taste.
Steps to stew meat:
• Preheat oven to 220 degrees Celsius.
• Put the oxtail on an oven tray and season with salt and pepper to taste.
• Bake for 20 minutes so that the meat releases its juices and takes on a golden colour.
• Meanwhile, in a saucepan (best if it is cast iron) over medium heat, toss the carrots, tomatoes, leeks, zucchini, thyme, rosemary and Parmesan with a drizzle of olive oil. Leave for 3 minutes so it all caramelizes.
• Add the 2 tablespoons of flour and mix well so that the flour gets toasted without burning.
• Then spill everything with the Mencía and leave it on low heat until the alcohol is consumed.
• Incorporate the meat and its juices into the pan. Mix everything and cover with water.
• Lower the oven to 170 degrees Celsius.
• Put the pan on high heat and bring to a boil.
• As soon as the water starts to boil, cover the pan and bake for 5 hours, stirring the meat every hour.
• After this time, once the meat is almost cold, shred it and pour the 20 ml. of Perrins sauce in.
• As for the vegetables, blend them, along with the juices of the meat, to obtain a sauce for the meat.
PIZZA
To get the dough’s recipe, visit the “Sourdough pizza” recipe.
Ingredients:
• 100 g. of shredded oxtail.
• 100 g. of grated medium cured cheese.
• 20 g. tomato puree or passata.
Steps to follow:
• stretch the pizza dough in a rectangular shape, being careful not to step on the ends (the cornicione).
• Paint the base with the tomato and cover with the shredded meat and the cheese.
• Bake at 250 degrees for 5 minutes or until the dough turns golden and crispy.
NOTES
Note 1: The quantities of the stew are intended for a meal of 4 people (approx.) As for the pizza, about 100 g. are more than enough. Note 2: If you see that the stew is getting dry in the oven, you can add more water. Note 3: to stretch the dough you can use a rolling pin or your hands (making circular movements). Stretch well all over the base (except at the ends to avoid ruining the cornicione). Note 4: Baking times will always depend on the power of your ovens and the thickness of the dough.
Pizza, mother of street food, is a dish as versatile (and controversial) as the Spanish omelette. It can hold all ingredient you can imagine (yes, pineapple too!) And is so good that no one can refuse a slice.
Although it is known that, as early as 8000 B.C. (with the origins of bread), flatbreads with cheese were part of the Middle Eastern diet, the first elaboration called pizza (made with white sauce) appears in Naples back in the sixteenth century. It is not until the seventeenth century that pizza started to look more like the dish we know today.
As a curious fact, a century later, in 1889, the famous Pizza Margherita was created (in honour of the Queen of Italy, Margherita di Savoia). Thanks to the colours of its ingredients (tomato, basil and mozzarella) this elaboration became a national emblem as it represented the colours of the Italian flag.
As for the dough, it is one of the simplest and most basic culinary procedures (water, yeast and flour) but, depending on the area it comes from, the thickness and shape of the dough may vary. Some of the best-known examples are:
• Neapolitan: the first original pizza recorded (if we do not take into account the proto-pizzas mentioned before). The main feature of the Neapolitan dough is its cornicione, a rounded, well-hollowed edge. In addition, the Associazione Verace Pizza Napoletana, states a series of rules to follow in order to make the authentic Neapolitan pizza, as it is recognized as STG. Among the many indications that this association requires we can highlight that the pizza must be completely artisanal (and cooked in a wood oven), it must proof a minimum of 8 hours, high quality ingredients must be used and the stipulated measures must be respected, not exceeding 35 centimetres of diameter and having a cornicione between 1 or 2 centimetres.
• Roman: Crispy dough with hardly any cornicione. The key to this pizza is its extreme fineness.
• Deepdish / Chicago: A dough of Italian American origin characterized by its thickness and its cheese-filled edges.
Ingredients
• 500 g. of 000 or bread flour.
• 48 g. of active sourdough.
• 300 g. lukewarm water.
• 10 g. salt.
• 15 ml. of EVO.
Steps to follow:
• In a large bowl, mix the flour with the rest of the ingredients until there are no dry elements left.
• Let it proof for 2 hours (no, you don’t need to knead!).
• After 2 hours (or when you see that the dough doubles in size), divide the dough into four portions and shape the buns.
• Leave them in the fridge in a container or tray covered with a rag or kitchen film for a minimum of 24 hours.
• Once the buns are out of the fridge, flour the work table and shape the pizza dough.
• To prepare a Roman pizza (if we are not expert pizza makers), the simplest method is to stretch it by using a rolling pin. Thus, you will obtain an ultra-fine dough.
• On the contrary, if you prefer Neapolitan pizza, the trick is to stretch your hands, cross your index fingers and stretch the dough outwards (always respecting the edges so as not to spoil the cornicione). Every 3 pushes you will rotate the dough. Once you have the dough half-stretched (about 15 cm) start stretching by using the outside of the little finger, making circular movements towards the ends.
• Once the dough is stretched, top the pizza with whatever ingredients you like and cover the base of a tray (or stone) with semolina.
• Bake at 250 degrees Celsius until you get a golden pizza with well-melted gooey cheese.
NOTES: Note 1: Once the proofing time in the fridge has passed, if you do not want to use all the buns, you can freeze them. They hold up perfectly in the freezer and once thawed they will continue to be elastic and gasified. Note 2: This amount of dough is for 4 medium-sized Roman or 2 Neapolitan pizzas (approximately 35 centimetres).
Quiche is a very practical dish: snacks, dinners or quick lunches accompanied by a fresh salad. Besides, the cool part is that served cold is even better. In addition, if you have kids (and they are not into vegetables) it is also a good solution to camouflage them in the middle of the cheese and the bacon.
Ingredients:
• Shortcrust pastry.
• 1 diced courgette.
• 200 g. of bacon.
• 200 ml. of cream.
• 3 eggs.
• 1 pinch of nutmeg.
• 100 g. of grated or powdered cheese. (I recommend using pecorino but, if you are looking for a softer flavour, emmental is also a good choice).
Steps to follow:
• Sauté the bacon over medium heat. Once it releases the fat, incorporate the courgette.
• Whisk the eggs in a bowl and then add the cream and the nutmeg.
• Place the shortcrust pastry on an oven tray where the edges can be adjusted upwards. (Remember that the pastry will be a container and the liquids must be kept in without overflowing).
Remember the Donuts we made a few weeks ago? So, when you find yourself with more dough than you initially need for the day, it is not necessary to make all the Donuts in one go. Luckily, this type of dough freezes perfectly, being able to leave it in the freezer until you need it again. In this case, I had dough to make half a dozen donuts but I decided not to spend much time and make a king size one, as if it were a cake.
For the icing, instead of spending loads of time melting chocolate, I varnished the surface with chocolate spread (before the doughnut cooled completely). Also, to finish with a touch of citrus, I sprinkled the surface with the homemade orange and lemon powder I taught you how to make yesterday.
And that’s basically it, in less than 30 minutes you have your doughnut ready to serve for a special breakfast, to offer your coffee dates (or keep it all to yourself!).
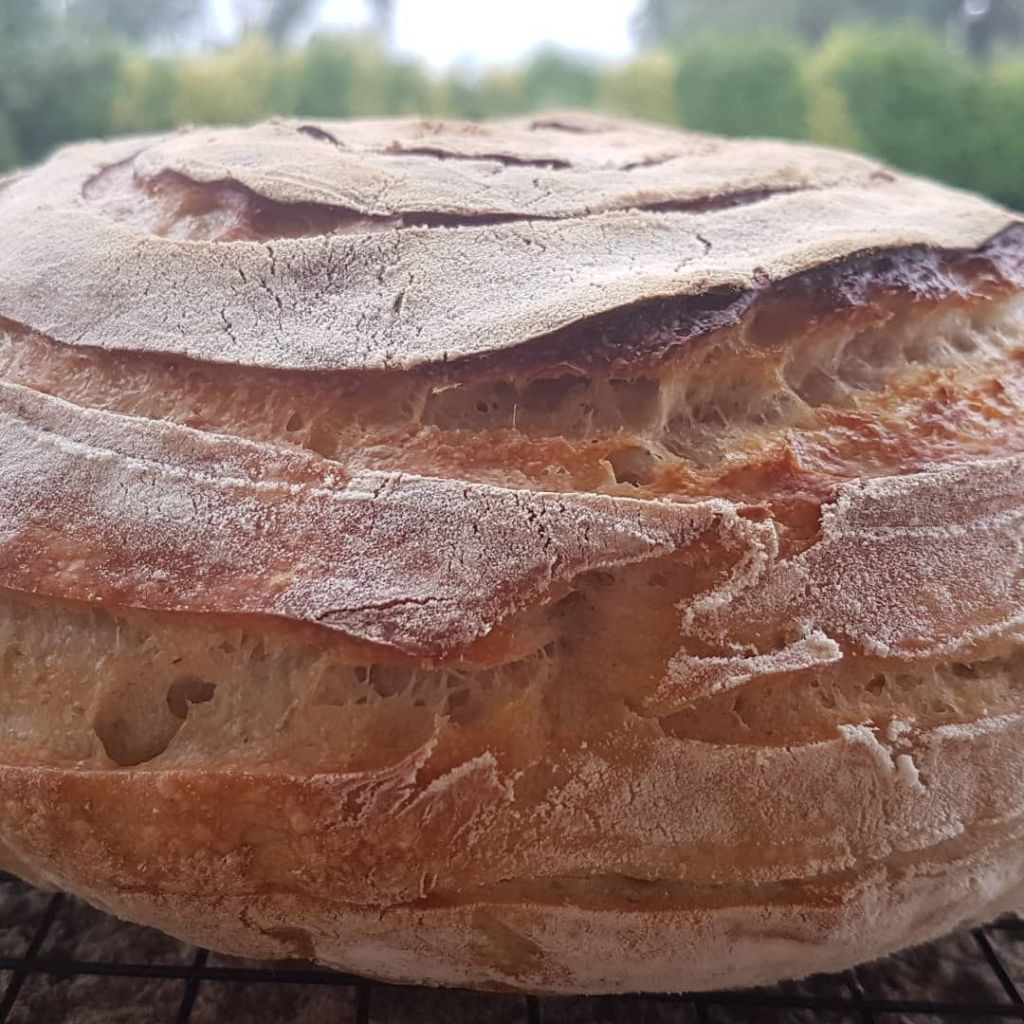
Bread has thousands of shapes and flavours, so every time we knead a new dough we can play with flours, hydration and shape. Today’s recipe is yet again another sourdough loaf (kneading ritual that I follow religiously every Sunday) but with a different mixture of flours and hydration, both in type and quantity. In this case, the thick crumb of this loaf is perfect for those meals in which it is nice to deep in a good piece of bread; in winter on stews and in summer with a good grilled sardine.
Ingredients
600 gr lukewarm water
100 gr Galician flour
750 gr 000 flour
160 gr sourdough starter
16 gr salt.
Technique
Mix the flours with the lukewarm water (until there is no trace of dry flour) in a large container that allows you to work the dough comfortably.
Let stand 20 minutes so the dough starts the process of self-management, called autolysis.
Add the sourdough to the whole, with a quick kneading, either with your fingers or with a spatula.
10 minutes later, add salt.
Block fermentation for 4 / 6h.
Use the stretch and fold technique every 40 minutes (approx.) during the block fermentation.
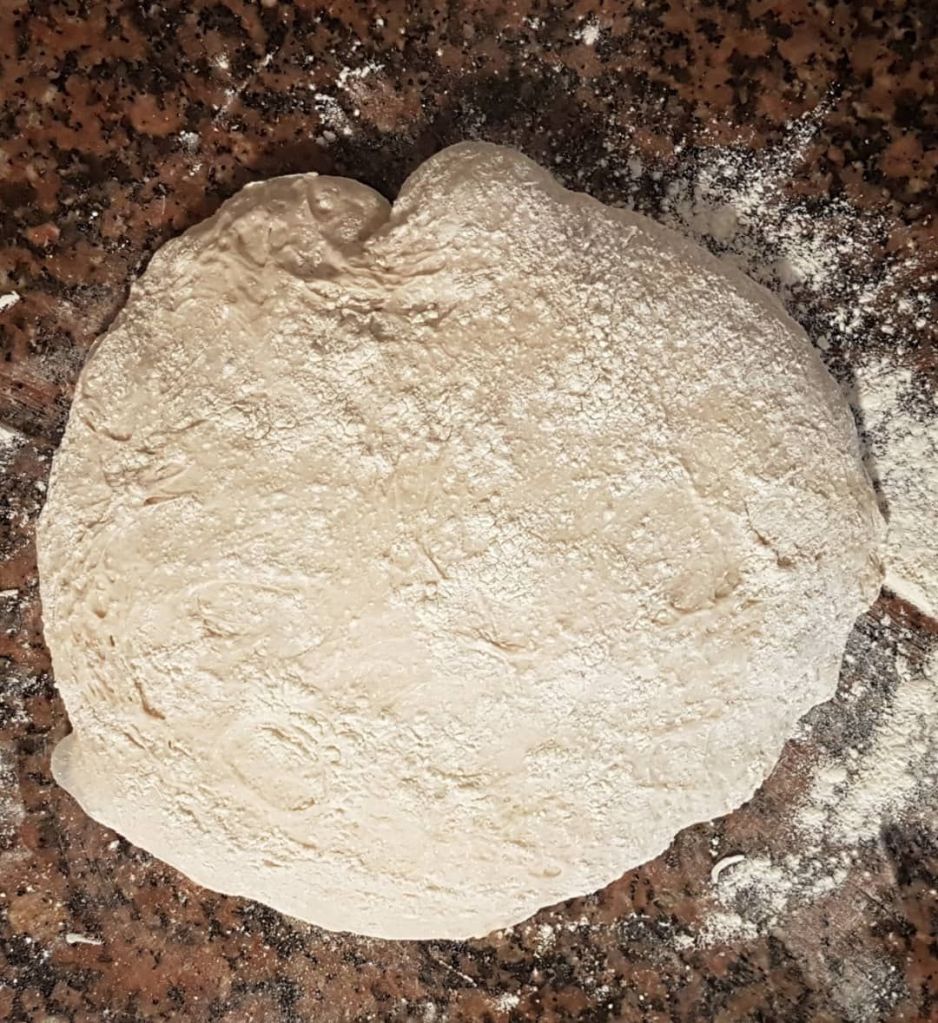
Flour the work table and shape the bread
Put the bread in a banneton and refrigerate for 14/16 h.
Preheat the oven to 250º with a Dutch oven inside.
Bake the bread for 20 minutes in the Dutch oven with the lid on.
Bake for another 15 minutes without the lid.
Let cool on a rack for about 2 hours before cutting.
The origins of Doughnuts, incredible as it may seem, are very ancient. According to Smithsonian Magazine, the doughnuts we know (and devour) come from olykoeks, from the Dutch cuisine. These balls of oil that Dutch settlers brought to Manhattan, back in 1624, were modified over the years to become the glazed and multiflavored doughnuts that we know today.
As for the original olykoeks creators, it is not very clear who was the real deal. On the one hand, there are those who claim that it was the Sephardic Jews of Portugal who, in the 15th century, introduced this typical Hanukkah sweet to the Netherlands. On the other hand, various voices indicate that it was the Germanic tribes that gave life to the olykoeks to be tasted at the Yule celebrations, during the winter solstice. Anyway, whoever the real creator of this marvel is, what is crystal clear is that the presence of doughnuts, in most recipe books all around the world, comes from afar.
Dough ingredients:
500 gr strong flour
80 g sugar
250 ml of full fat milk
15 gr fresh yeast
1 pinch of salt
1 beaten egg
50 gr butter
5 ml vanilla extract or the seeds from a fresh pod
Icing ingredients:
50 gr melting chocolate
20 gr of butter
120 gr icing sugar
First of all, it is necessary to prepare a pre-fermentation. A kind of quick sourdough, so to speak, which helps the process of leavening the dough.
Steps to make the Pre-fermentation:
– Dissolve the fresh yeast in a stream of milk at room temperature.
– Incorporate 3 tablespoons of flour in the mixture of milk and yeast, until it has a dough texture.
Let stand 15 minutes
Steps to make dough:
– Mix the flour, sugar and salt in a large bowl that allows you to work the dough, if you are kneading by hand. If you are going to use a robot, throw the ingredients directly into the kneading bowl.
– Add the milk, little by little, to the dough.
– If you work with a robot, this will be the time to put the kneading hook (always medium speed) and add the beaten egg.
– Add the pre-ferment to the whole mixture and continue kneading.
– Once the dough is well formed and no longer stains the kneading bowl, add the vanilla.
– When the vanilla is already incorporated into the dough, add the butter in two stages: first one half and, when there is no trace of it, the other half.
– When the dough no longer sticks or stains, it is ready to rest.
Let stand 90 minutes
Steps to form the doughnuts:
– Roll out the dough with a rolling pin [thickness 1.5 cm approx.]
– Shape the doughnuts with a round mold or, if you don’t have a mold, use any round container or pasta cutter you have at home.
– To make the inner holes, if you do not have mold, we can use the nozzle of a narrow bottle.
Let stand 45 minutes
Steps for frying the doughnuts:
– Put plenty of oil in a saucepan over medium / high heat.
– Leave each donut for approximately 1 to 2 minutes on each side (always depending on the power of the stove).
Steps to make the icing:
– Melt the chocolate with the butter in a double boiler.
– As soon as the chocolate is ready, add the sugar and mix well until fully incorporated.
NOTE: It is important not to let the doughnuts completely cool before icing them. Once we remove them from the heat, it would be best to let them drain a little on a cooling rack and then dip them into the icing. Once this step is done, leave the doughnuts on the cooling rack again so that the icing hardens.